Tag

Showing blog posts sorted under the tag: dreamcast

Pico2Maple - Sega Dreamcast Controller Adapter using Raspberry Pi Pico 2

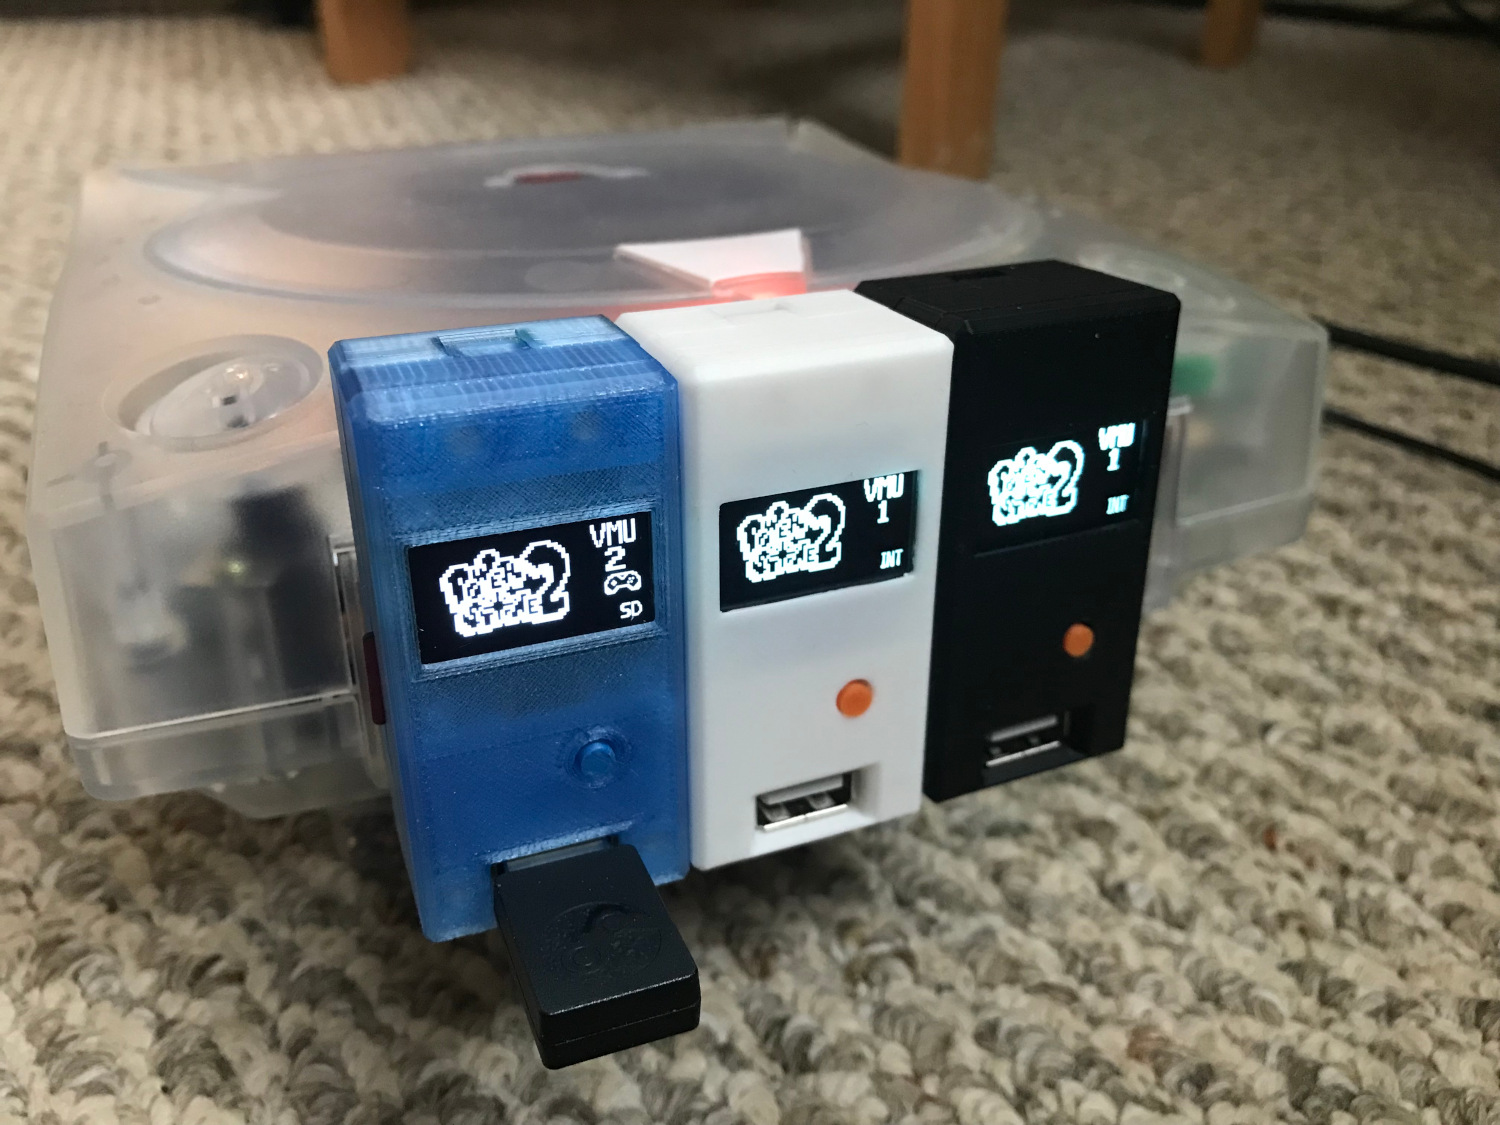
Pico2Maple prototypes powered on during Power Stone 2.

Since getting the Steam Controller working on the Sega Dreamcast, I've been expanding the idea into a general-purpose USB-to-Dreamcast device with an eye on potentially selling it as a product. To that end, I've created a few prototype devices of something I'm calling Pico2Maple.

Pico2Maple is a dongle that plugs into the Dreamcast and allows USB devices to be used on the system in place of original Dreamcast peripherals. Several controllers, keyboards, and even some mice are supported (yes the Dreamcast had an official keyboard and mouse). Additionally, Pico2Maple emulates a VMU - the Dreamcast's memory card - complete with a tiny OLED screen and saving files to a microSD card for easy backups.

So far, I've confirmed the following controllers to work:

  • Steam Controller
  • 8BitDo SN30 Xbox
  • XInput controllers (Xbox 360, One, Series)
  • Sony DualSense5
  • 8BitDo Wireless Dongle (great for connecting a variety of other controllers wirelessly)

Most USB keyboards should work for games like Typing of the Dead or chatting in Phantasy Star Online. Mouse support does need a bit of improvement but chances are good most will work; it's hard to find enough hardware to test things like this.

Some USB devices will report multiple descriptors (a mouse may report as a mouse and a keyboard) for extra functionality. Pico2Maple will try and use the first valid device it sees and pass that through to the Dreamcast. Unfortunately, it's not possible to report multiple devices through a single Dreamcast controller port.

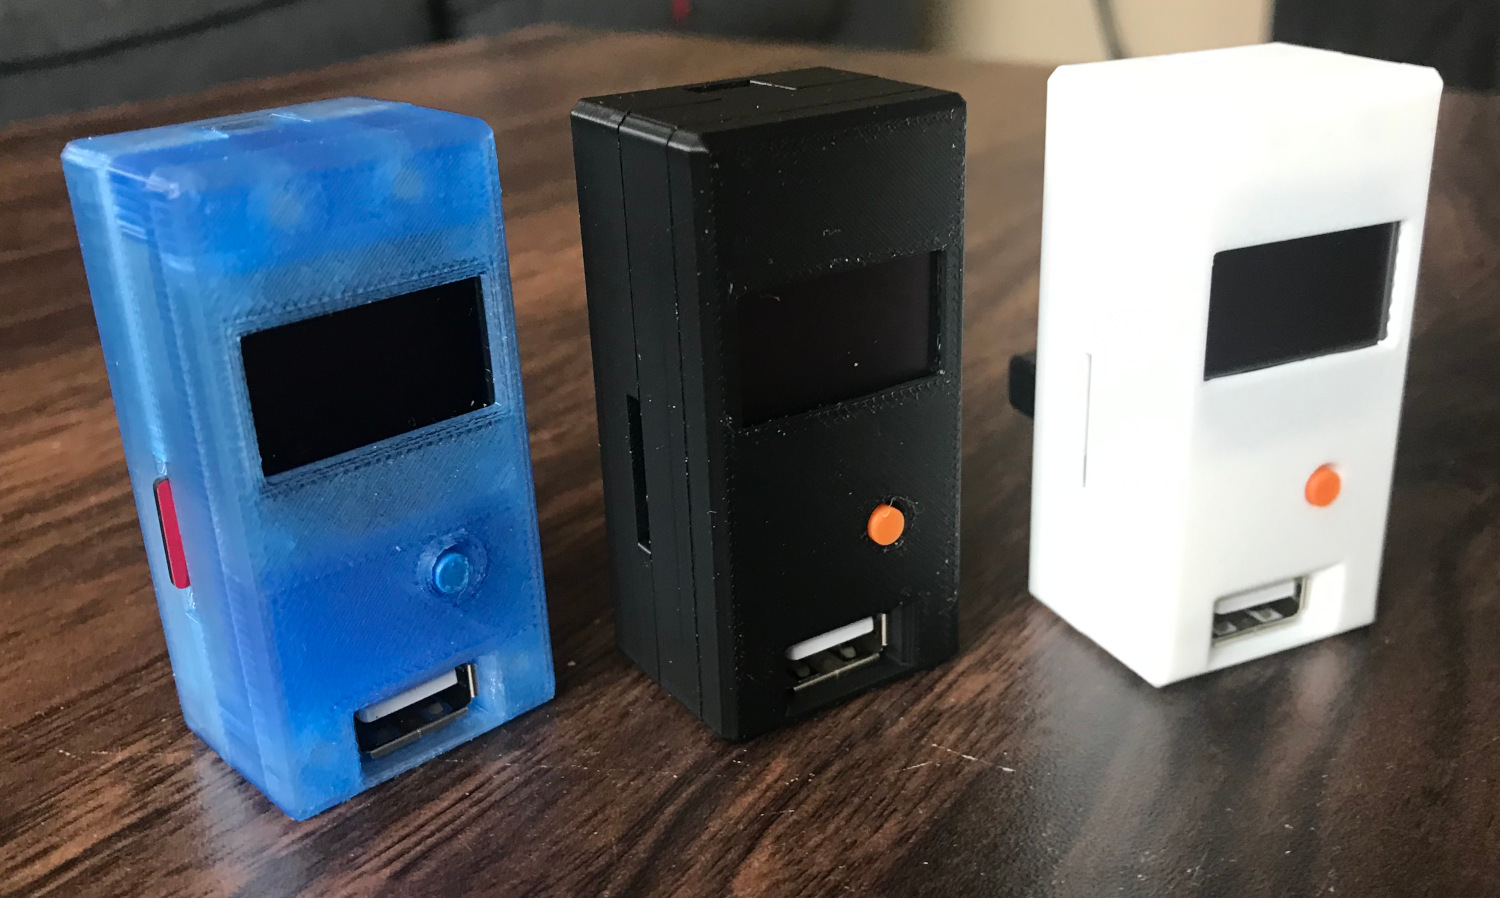
Pico2Maple prototypes.

The brains of the device is a Raspberry Pi Pico 2 with my custom firmware and Maple bus implementation. The firmware is not open source at the moment, but the binaries are available on my GitHub if anybody wants to make their own version of the hardware.

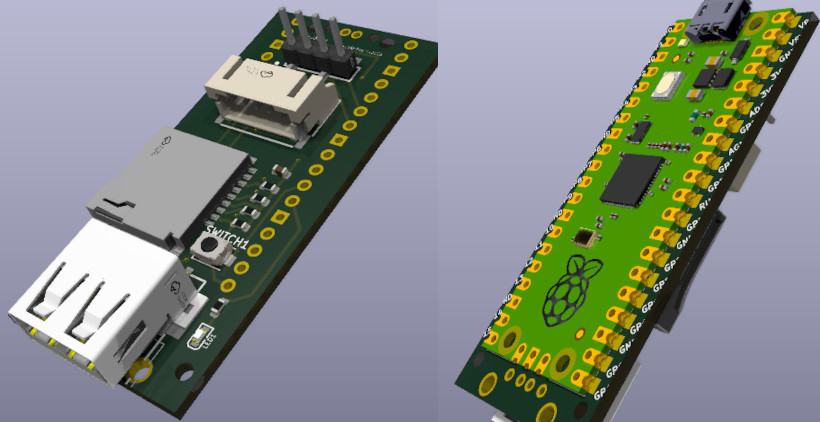
When I started working on this project, the RP2350 chip powering the Pico 2 was not readily available, so I designed a custom PCB where the Pico 2 board could be soldered directly to it. Since most of the 'real' electronics are on the Pico board, my PCB is more-or-less just a way to connect all the extra components and peripherals, with a form factor that would work well for a dongle.

Surprisingly, the prototype PCBs I ordered worked great! I must have gotten lucky because there were no functional issues with the boards. Due to the insane shipping times to where I live though, I was moving a bit fast and wasn't completely decided on a final design when I ordered the PCBs. This is why the USB port is facing the wrong direction and meant I had to do a bit of extra manual prep work on the boards. I hope to do a second revision to fix that, and move around a few components for a better overall fit.

Pico2Maple PCB render.

In addition to the custom PCB, this project was also my first experience with CAD and 3D printing. I designed the entire enclosure for the dongle in FreeCAD and printed them on a BambuLab P1S. The main body of the dongle is made up of 3 pieces that sandwich the electronics together and four m2 screws, with threaded inserts, extend through the whole dongle and squeeze everything tight.

It took quite a bit of tweaking a test-printing to get the fit I was going for but I think it was worth it in the end. They came out looking almost exactly like what I had imagined! (Wavebird dongle vibes anyone?)

The final dimensions of the dongle are roughly 30mm wide, 25mm deep, and 61mm tall. I would say they are a smidge too wide and are therefore a bit too snug when multiple are plugged in. The microSD card also sticks out about 1-2mm so, even though four can fit in the console by themselves, not all would be able to have SD cards plugged in. Ideally I'd shave off maybe 2mm from the width and have the microSD cards be flush for a better fit.

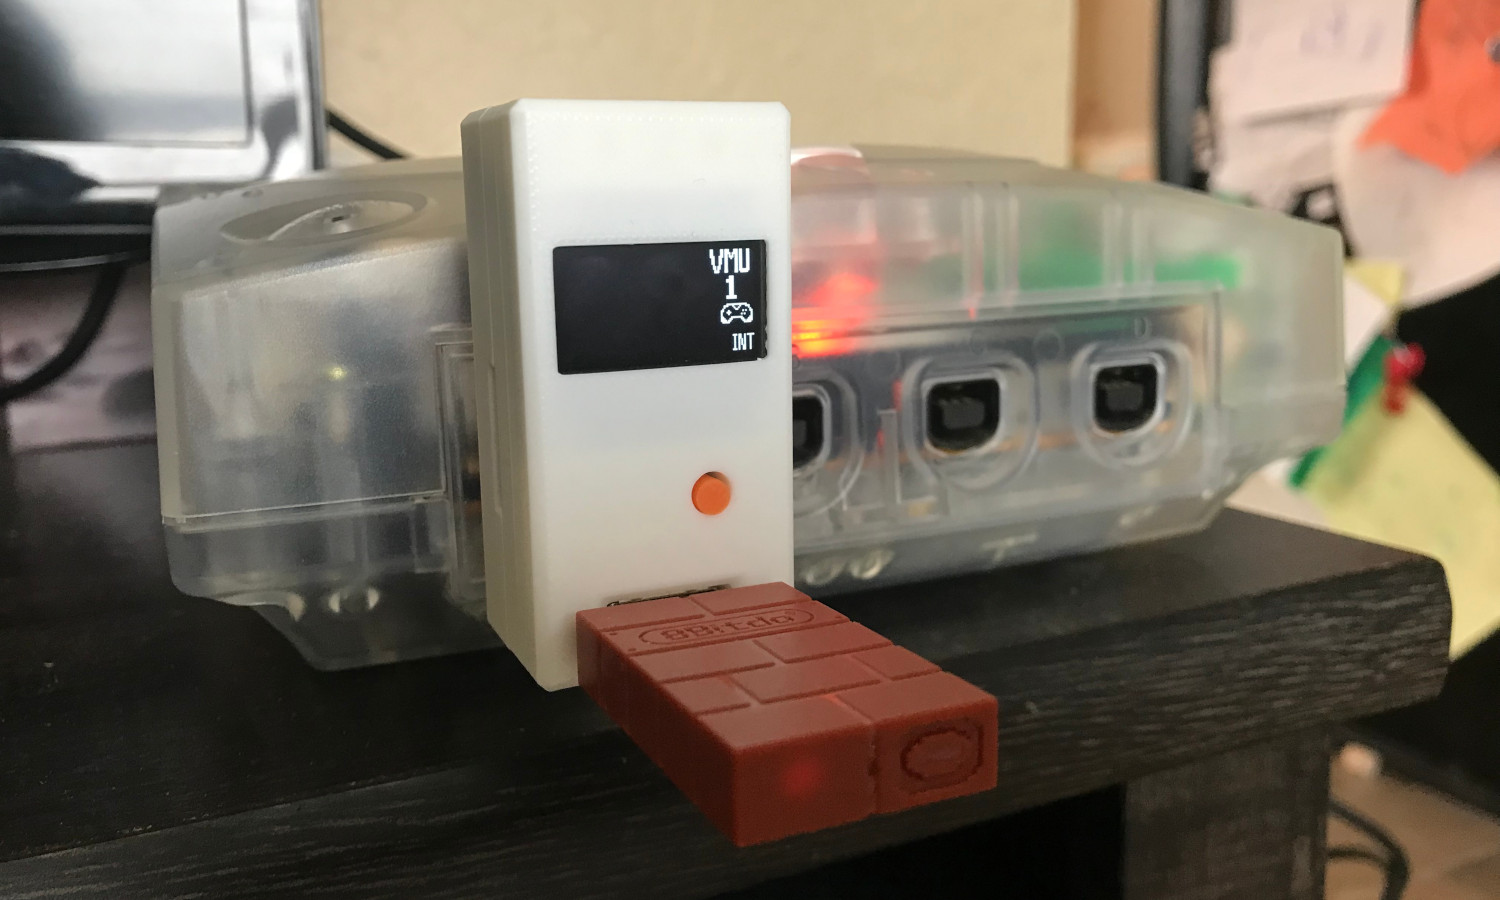
Other than being a bit too wide, I think the rest of the dimensions are perfect and they look pretty slick when plugged into the Dreamcast.

A Dreamcast-coloured Pico2Maple powered on.

I mentioned earlier that I hope to produce and sell these to fellow Dreamcast enthusiasts but the current road block is that assembly simply takes way too long to make it worth it. Between soldering the Pico to the main board, wiring up the Dreamcast plug, and final assembly, the whole process takes maybe 45-60 minutes which is too long for me. Plus I don't really like being hunched over a soldering iron for so long.

I could save some time if JLCPCB could presolder the Pico 2 boards for me, or if I could design a PCB using the RP2350 chip directly. But that still leaves wiring up the Dreamcast plug which is what really takes the bulk of the time, trimming wires and soldering the pins. I'd guess it would still take around 30 minutes to put one together which still seems too long.

If anybody has any tips on speeding up manufacturing I'd leave to hear it. I would also be open to potentially licensing the firmware and letting somebody else handle the manufacturing. Either way, feel free to reach out!

Thanks for reading!

Tags:


Using the Steam Controller on the Sega Dreamcast with Raspberry Pi Pico 2

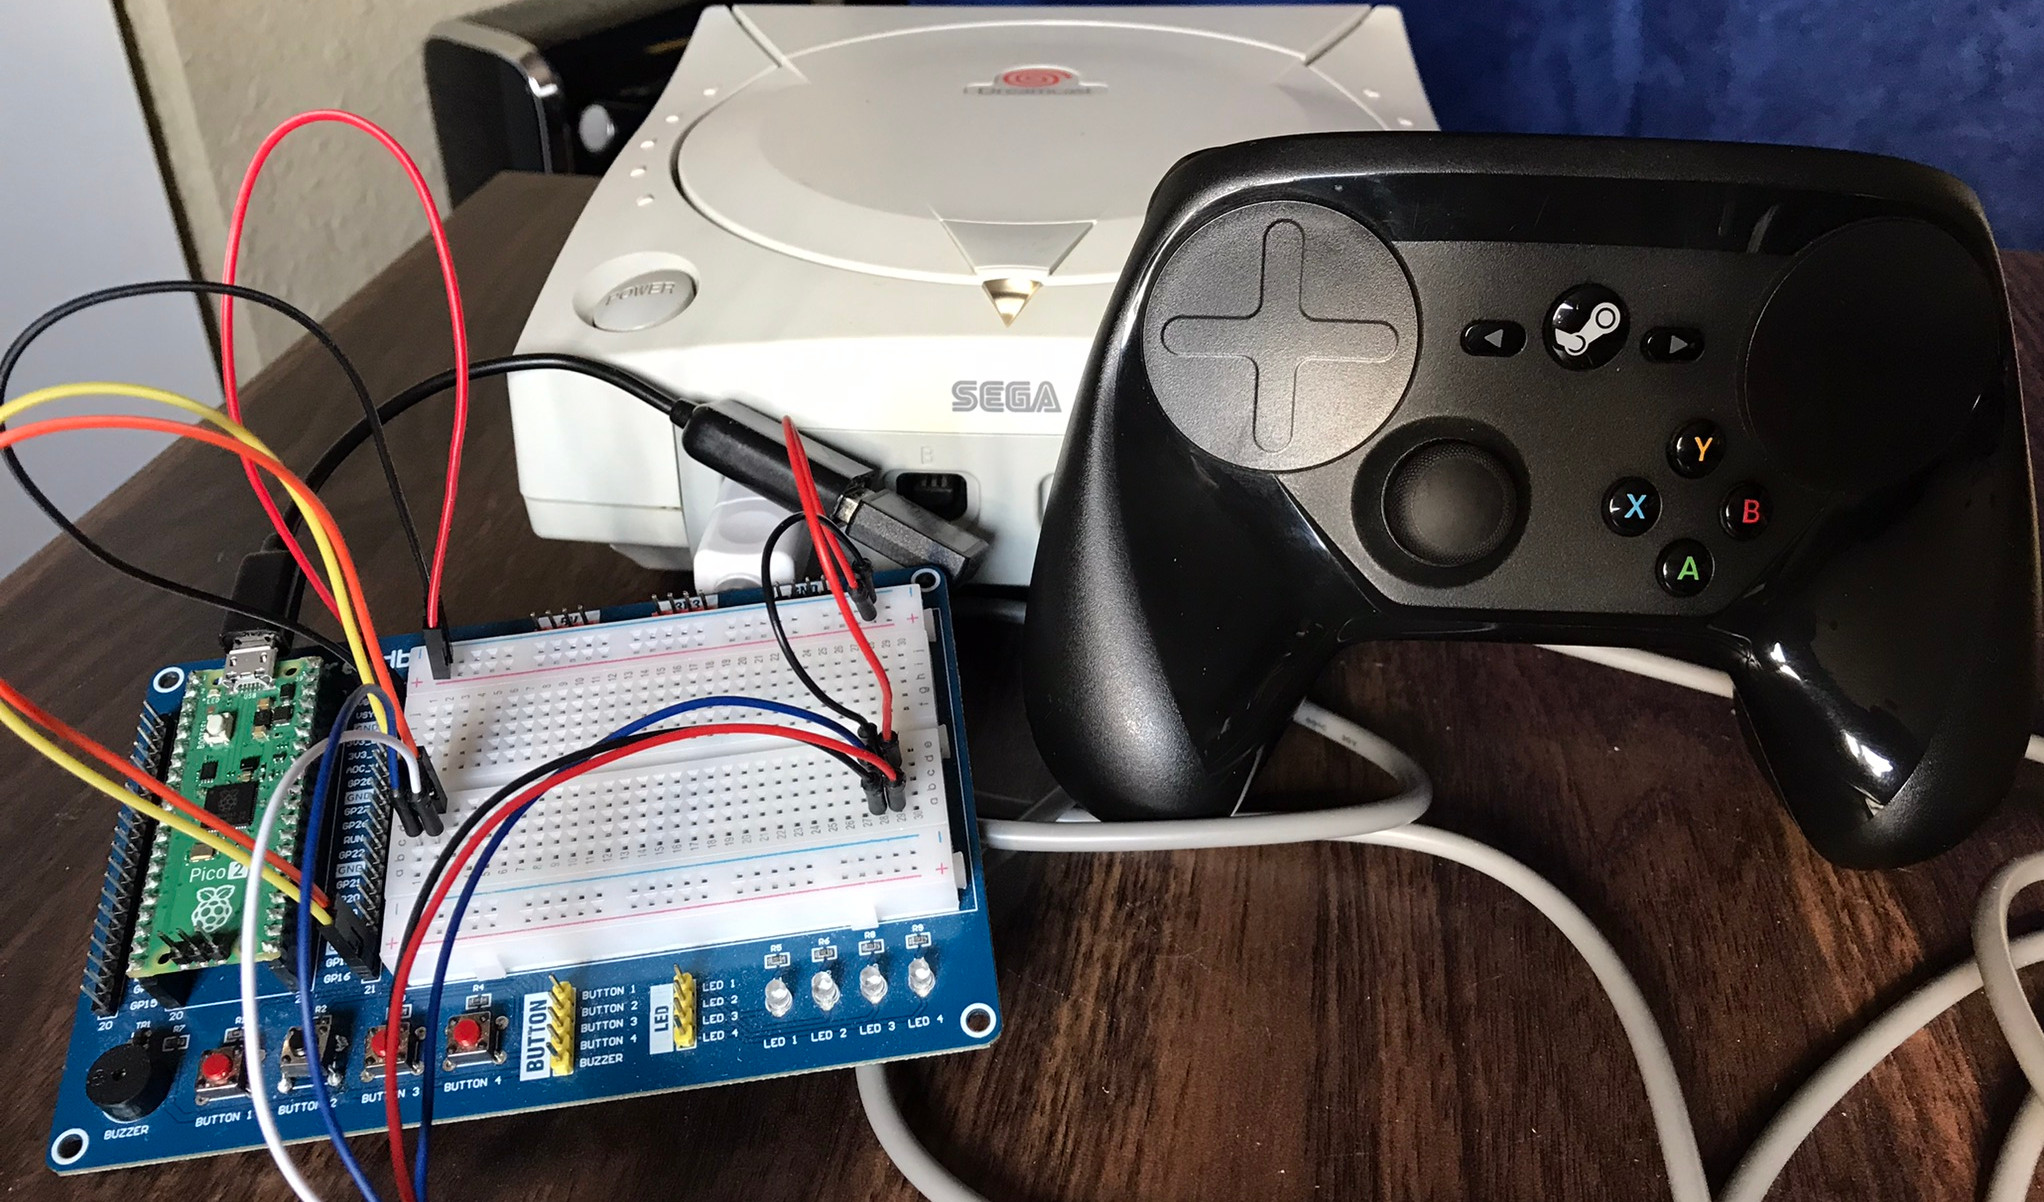
Pi Pico 2 with Steam Controller and dongle next to a Dreamcast.

I've been scratching my head to come up with a project to play around with the Raspberry Pi Pico's PIO (programmable input/output) and eventually had the idea for some sort of converter to use non-Dreamcast peripherals on the Dreamcast. Of course, all good ideas have already been done, in this case not once or twice, but three times as far as I'm aware, and probably more.

All of these projects are based on the RP2040 chip (original Pico), while I wanted to make use of the new RP2350 (Pico 2) chip. In particular, there is a new PIO input masking feature available on the RP2350 which I think makes for a better implementation for reading the Dreamcast's Maple bus. Also, none of the previously-listed projects actually allow me to use by beloved Steam Controller. All this to say that I really wanted to try things on my own.

The Maple Bus

The Maple bus is how the Sega Dreamcast talks to peripherals on the controller port. It's a two-wire protocol where each wire takes turns being the clock and being the data. Essentially when a wire goes low, it signals that there is data on the other wire (a 1 or a 0), it allows a bit of time to read the bit, before the appropriate wire goes high in preparation for another falling edge.

Below is a sample reading of the Dreamcast send a packet to a controller. In this particular case it's Command 0x01 which is a request for information about what the peripheral is capable of. Hopefully you can see that every falling edge represents one bit of data, read from the other wire. I hope to go into more detail about the Maple protocol in a separate blog post.

PulseView reading of the Dreamcast sending a Maple packet.

Reading and Writing with Maple

To actually read and write data to the Maple bus, the RP2350's programmable input/output (PIO) sounded like the perfect solution. PIO on the RP chips are like little tiny co-processors that can run at a fixed clock rate. Each PIO block has 4 state machines, each with a few registers, and access to a shared space of up-to 32 instructions from a very limited set of instructions.

I wrote two PIO programs, one for reading and one for writing, and both got close to the 32 instruction limit so I ended up using two of the three PIO blocks available on the RP2350. With four state machines in each PIO block, it should - in theory - be possible to read and write from up to four controller ports on the Dreamcast. Though I'm only using one at the moment.

To read the Maple bus, I configured the PIO to constantly check the value of the 2 data lines, waiting for the value to change due to a line going high or low. It takes advantage of the fact that the Maple bus only has data available during a falling edge, meaning a valid is read when the voltage on the wires either goes 11->10/01 or 10/01->00. The former is interpreted as a 1 and the latter as a 0. The PIO program then pushes this bit (eventually) back to the main C program where it can be interpreted.

Writing to the Maple bus was a lot more straightforward. A bunch of data is fed to the PIO which clocks out the start-of-packet signal then starts sending the data accordingly, before finishing with the end-of-packet signal when no more data is available in its buffer.

The next two images below show what the whole thing ends up looking like on the wire. The first packet, pictured below, is a request for data coming from the Dreamcast, and the second packet is the requested data being supplied by the Raspberry Pi:

PulseView reading of the Dreamcast sending a Maple packet requesting data from the controller.

The above packet is send by the Dreamcast and has a command code of 0x9, which is a 'Get Condition' command. It also has some included data (the pink bubbles) with a value of 0x00000001 which should be interpreted as 'Controller'. So, it's asking for the current status of the controller.

PulseView reading of the Pico responding to the Dreamcast with data.

This packet is sent by the Pico in response to the Get Condition command. It has a command code of 0x8 which says that this is a response packet with some data attached. The first 4 bytes are again 0x00000001 saying this is about the controller, then the remaining bytes describe which buttons are pressed and the current axis values of the joystick and triggers.

The whole request and response only takes about 125 microseconds or 0.125 milliseconds. But the controller state is requested about every 16.7 milliseconds, or once per frame at 60fps.

Getting Data from the Steam Controller

Getting USB data from the Steam Controller was surprisingly straightforward since the Pico SDK has TinyUSB as a built-in library. So, with that and the hid-controller example from the TinyUSB docs I was able to start getting the raw USB data quite quickly.

To interpret the raw data that was coming from the controller, I referenced Linux's hid-steam driver as it has mappings as to the meaning of specific bits and bytes sent by the Steam Controller.

Then it was just a matter of keeping track of what buttons are pressed, and sending that data to the Dreamcast via the Maple bus whenever it was requested.

The Second Analog Stick

It's not really a secret, but also not widely known that the Dreamcast supports 2 analog sticks. Very few games will even accept input from a second analog source; Quake 3 and Unreal Tournament are two games known to support it. So, to make full use of the Steam Controller, I wanted the right trackpad to emulate the second analog stick.

To do this, I started by sampling touchpad X,Y-coordinates from the Steam Controller to try and get a velocity of finger movement. Just taking a single change in X,Y from every poll of the controller was quite jittery and not a very pleasant experience. By keeping track of the last several readings, I was able to calculate the average velocity which gave much better results. I played around with a few values but found that 10 samples was generally enough for input to feel smooth.

Another component to a nice touchpad experience is inertia from a quick flick. Basically, input should continue in the last know direction for some time whenever a finger is lifted off the touchpad. I did this by taking the last calculated average velocity and feeding it into an easing - exponentially decaying - function. Again, this involved some experimentation to get a good feel. Eventually, I landed on a cubed decay that lasted 400 milliseconds. Putting a finger back on the touchpad will also stop the inertial movement so it really feels like flicking a trackball around.

Closing

This really wouldn't have been possible without the awesome Dreamcast documentation from Marcus Comstedt. I'm no electrical engineer so his explanations of the exact workings of the Maple bus were invaluable. He also happened to write the Maple bus decoder for PulseView which generates the nice little data bubbles under the logic analyzer readouts. This project would have easily taken twice as long without that. I highly recommend checking out his stuff if you are interested in knowing more about the inner workings of the Sega Dreamcast.

There's also a little video showing the controller in action below, playing some Sonic Adventure.


Tags: